This is an old revision of the document!
Table of Contents
![]()
eduroam on windows (Windows 7 onwards)
This documentation describes ways to establish a connection to the WPA2 encrypted network eduroam.
Preparation
Please make sure, that your WiFi network adapter is configured to automatically receive an IP address instead of a manual address. This can be configured in
System Settings→ Network and Sharing Center→ Change adapter settings→ WiFi adapter: Settings → TCP/IPv4 .
In order to configure eduroam correctly, you need your student e-mail address (name.lastname@stud.uni-goettingen.de resp. n.lastname@stud.uni-goettingen.de) and your password.
Members of different universities have to use an account in the form of XXX@uni-kassel.de, XXX@uni-hannover.de, XXX@leuphana.de, XXX@uni-freiburg.de, XXX@uni-regensburg.de, XXX@abdn.ac.uk. Generally, we advise you to use the CA-Tool of your organization (follow this link and search for your institution )
configuring eduroam
Configuration via CA-Tool
The easiest way to configure eduroam correctly is to use the CA-Tool. Please download the right tool that matches your Windows version here and save it to a hard or a flash drive. Then double click it in order to start the configuration process.
Unfortunately, the CA-Tool does not run on Windows 10S. In this case, you have to do the configuration manually
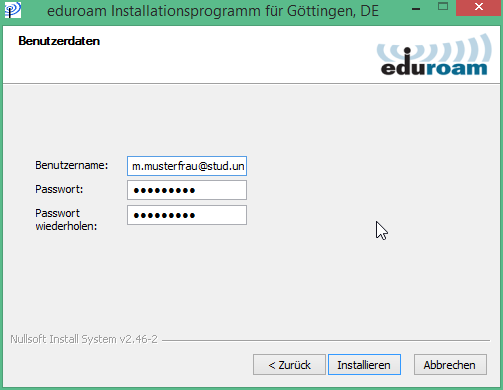
After clicking on next and OK you will be asked to enter your user credentials. As your username, please fill in your university e-mail address and your account password (the same that you use on eCampus) and click on install.
Finally, click on Finish, click on the WiFi icon in the taskbar and connect to the eduroam network. If you keep “connect automatically” checked, your device will connect to eduroam automatically if the network is within reach.
Manual configuration
This documentation and the corresponding screenshots describe the manual configuration of a connection to the eduroam network using a computer that is runnings Windows 10. The procedure is basically the same on older versions of Windows.
1. Activate the WiFi adapter of your device.
Right-click the Windows icon in the taskbar and select Network Connections.
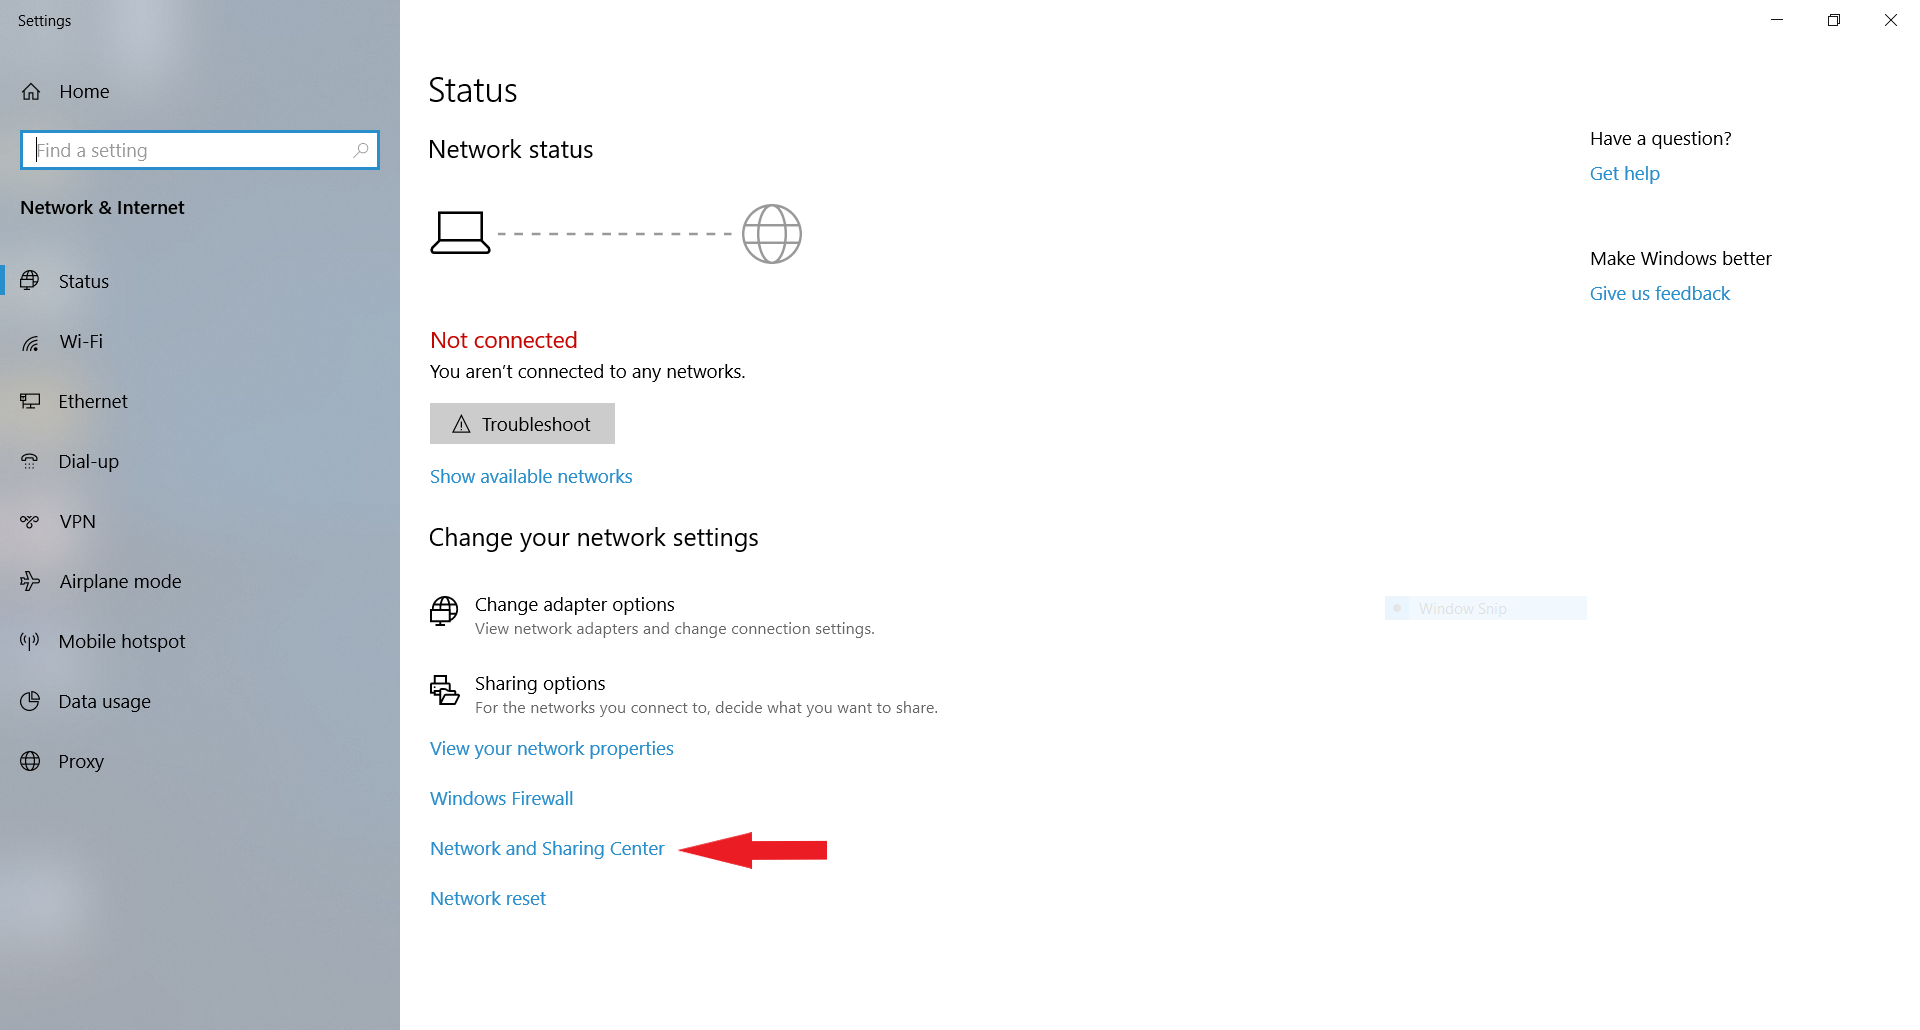
2. Open the Network and Sharing Center
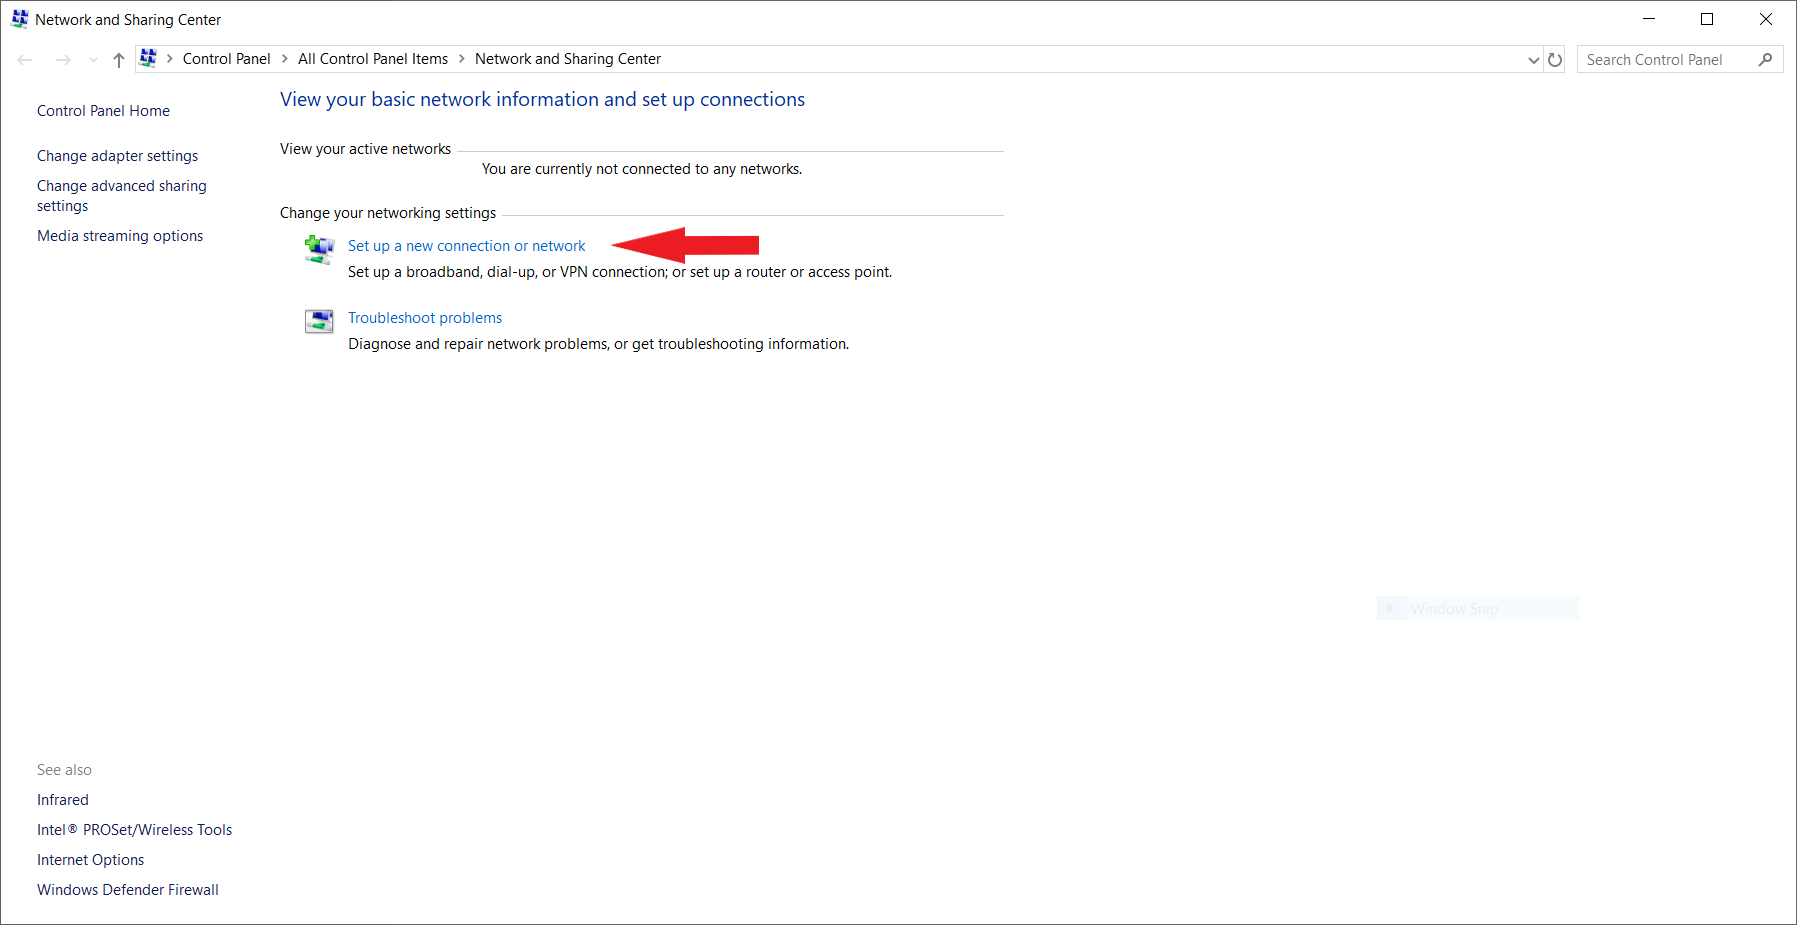
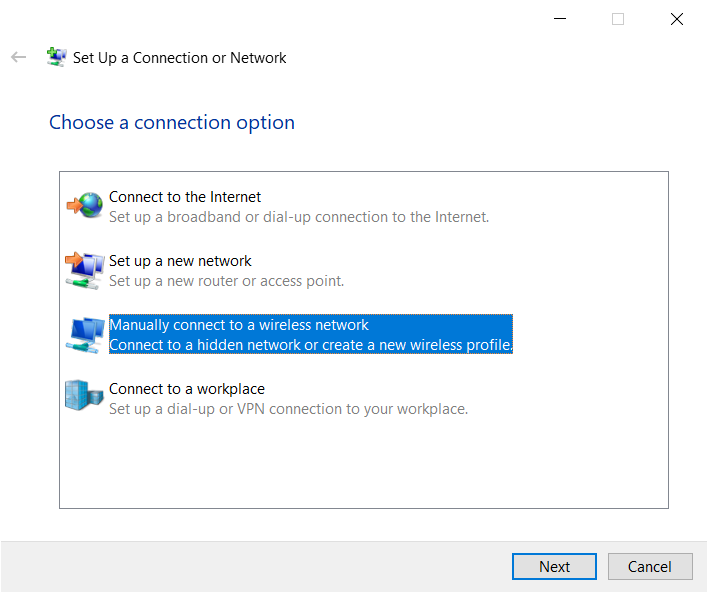
2. Select Set up a new connection or network.
3. Now select manually connect to a wireless network and click Next.
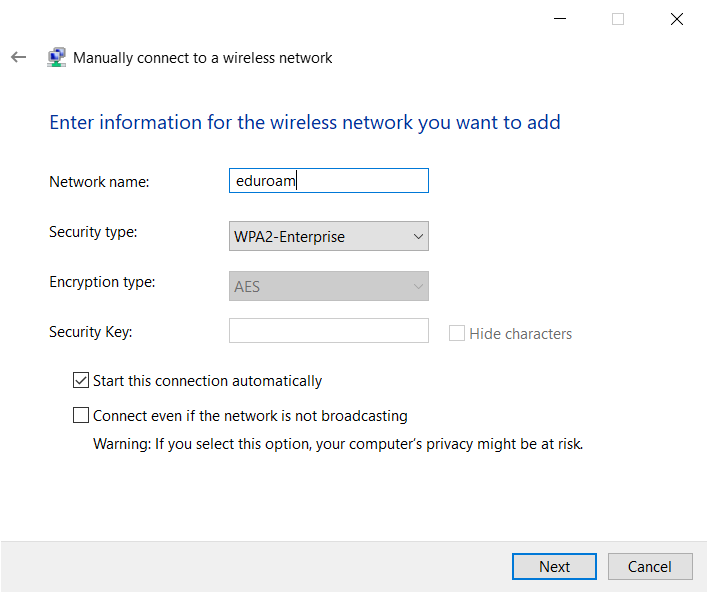
4. Enter the following information and click Next.
- Network name: eduroam
- Security type: WPA2-Enterprise
- Encryption type: AES
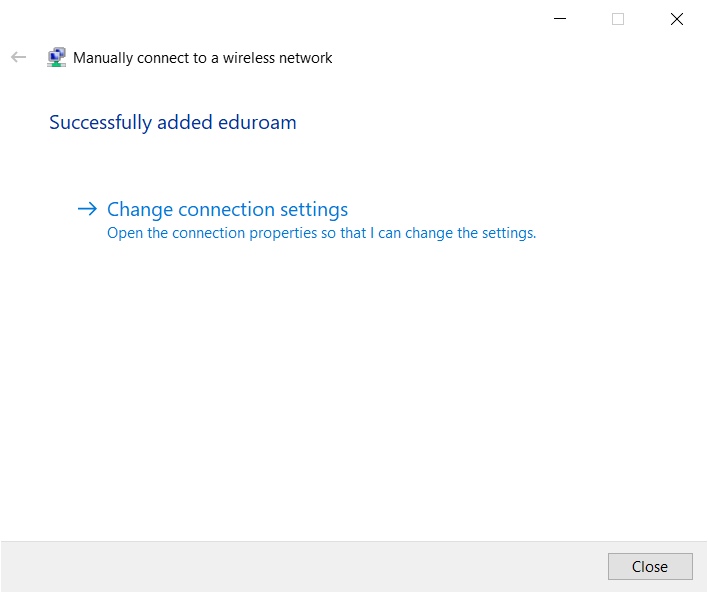
5. You successfully added the network eduroam to the network settings. Now click on Change connection settings.
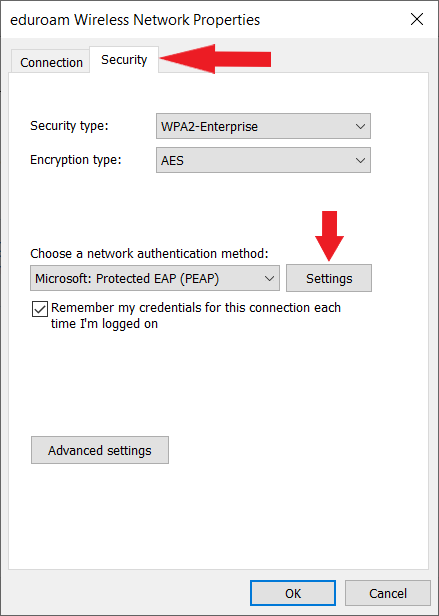
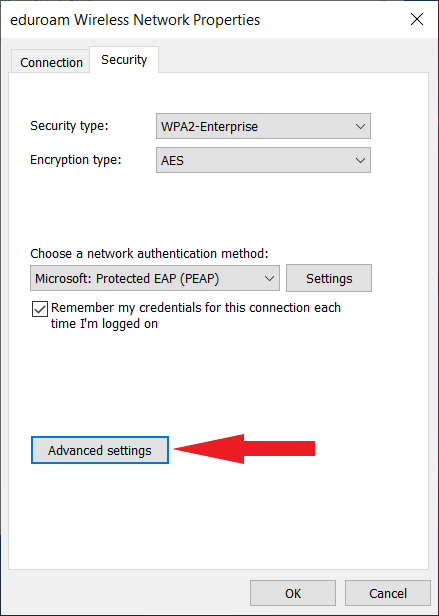
6. Es öffent sich ein Fenster Eigenschaften für Drahtlosnetzwerk eduroam.
Klicke auf den Reiter Sicherheit und wähle dort als Netzwerkauthentifizierungsmethode Geschütztes EAP (PEAP) und klick dann auf die Schaltfläche Einstellungen.
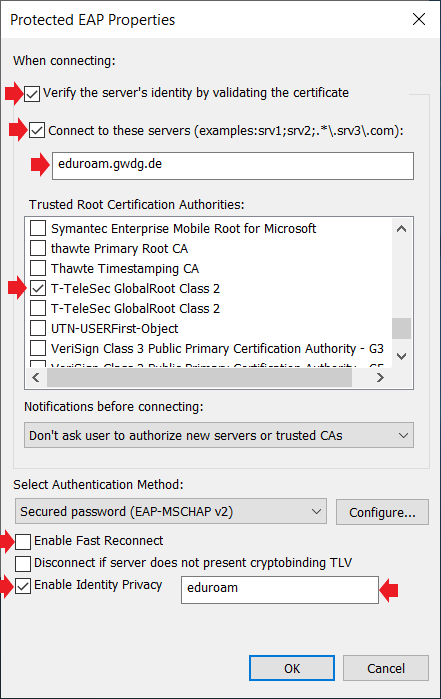
7. Es öffnet sich ein weiteres Fenster Eigenschaften für geschütztes EAP.
Setze ein Häkchen bei Identität des Servers mittels Zertifikatsprüfung überprüfen und bei Verbindung mit folgenden Servern herstellen. Trage im Textfeld darunter eduroam.gwdg.de ein. Entferne das Häkchen bei Schnelle Wiederherstellung der Verbindung aktivieren.
Setze in der Liste der vertrauenswürdigen Stammzertifizierungsstellen ein Häkchen bei T-TeleSec GlobalRoot Class 2. Taucht dieser Eintrag nicht in der Liste auf, stelle bitte zunächst sicher, dass die aktuellen Windows-Updates, insbesondere die Stammzertifikatsupdates installiert sind. Alternativ kannst du das Zertifikat hier herunterladen.
Als Authentifizierungsmethode wähle Gesichertes Kennwort (EAP-MSCHAP v2). Klicke auf die Schaltfläche Konfigurieren direkt daneben.
Wähle die Option Identitätsschutz aktivieren und trage im folgenden Textfeld eduroam ein.
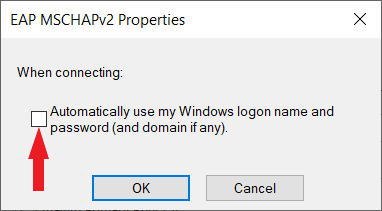
8. Entferne das Häkchen bei Automatisch eigenen Windows-Anmeldenamen und Kennwort verwenden und bestätige mit Klick auf OK.
Schließe auch das Fenster Eigenschaften für geschütztes EAP mit einem Klick auf OK
9. Zurück im Fenster Eigenschaften für Drahtlosnetzwerk eduroam, klicke auf Erweiterte Einstellungen und setzen dort ein Häkchen bei Authentifizierungsmodus angeben: Benutzerauthentifizierung.
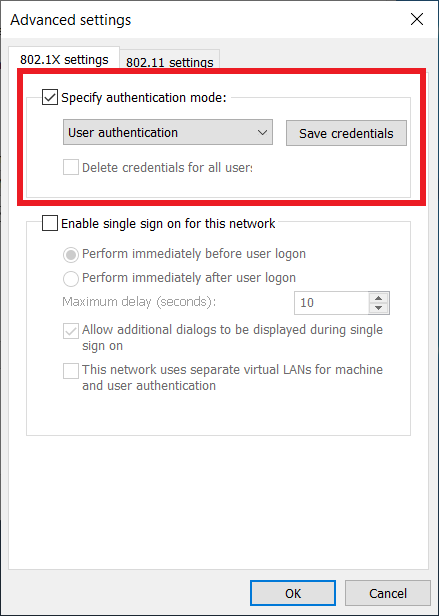
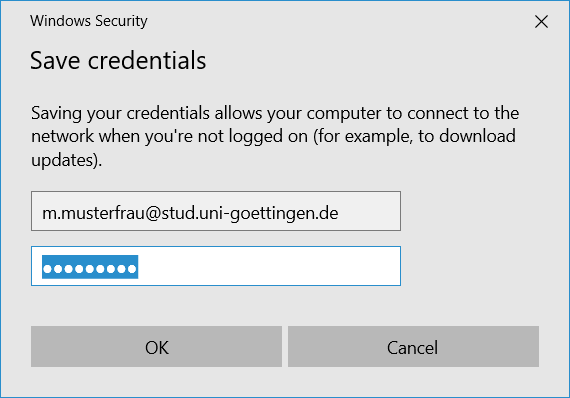
Klicke auf Anmeldeinformationen speichern und trage dort deine studentische Mailadresse (accountname@stud.uni-goettingen.de) und das zugehörige Passwort ein. Bei der Einrichtung eines anderen Accounts kannst du die Form des Accounts dieser Liste entnehmen.
Bestätige deine Eingabe mit einem Klick auf OK.
10. Die Konfiguration des Zugangs ist nun abgeschlossen. Schließe sämtliche Fenster mit einem Klick auf OK beziehungsweise Schließen.
Über das WLAN-Symbol in der Taskleiste kannst du dich nun mit dem Eduroam-Netzwerk verbinden.
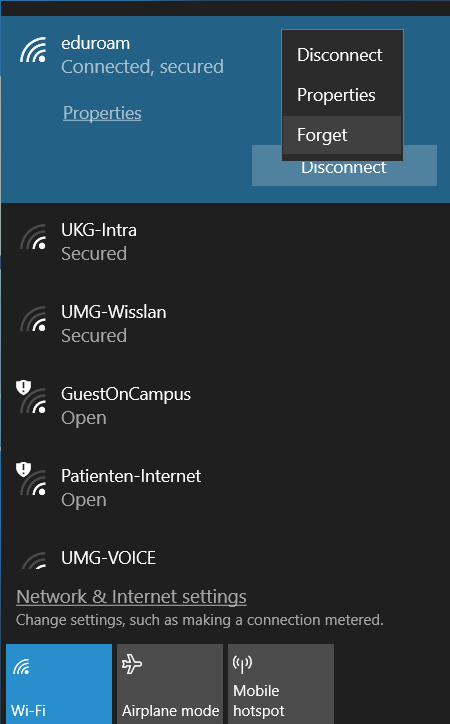
Die Konfiguration für eduroam löschen
Um eine alte Konifiguration für eduroam zu löschen, klicke mit linken Maustaste auf das WLAN-Symbol in der Taskleiste und dann mit der rechten Maustaste auf eduroam. Hier klickst du auf den Eintrag Nicht speichern. Anschließend kannst du eduroam neu einrichten
| erstellt von | fritzsche |
|---|---|
| erstellt am | 05.07.2019 11:44 |