Table of Contents
Slide scanner Nikon Superscan 9000 (LRC KWZ)
In this short instruction you will get to know how to use the slide scanner at the LRC KWZ. Here you can find and download the complete manual in English. Here you can download the manual for the scan software as PDF (in German).
1 The device
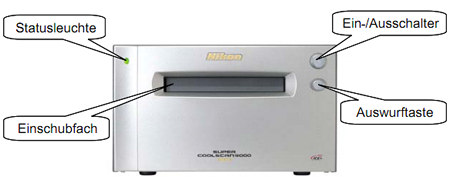
Statusleuchte: status LED
Einschubfach: holder slot
Ein-/Ausschalter: power switch
Auswurftaste: eject button
2 Handling
2.1 Preparation
Attention! The scanner should be switched on before you log in!
2.2 When to use which film holder?
There are three different film holders which can be inserted with different media (slides or films).
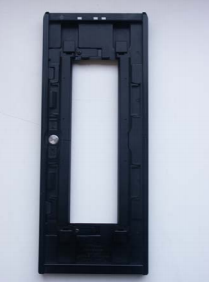
2.2.1 Small format slide holder FH-835M
The FH-835M can be used to scan up to five 35-mm slides (size “135”) with mounts 1.0–3.2mm thick. It can be used for every kind of frame (paper, plastic, glas).
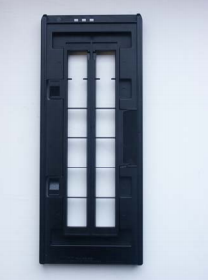
2.2.2 Small format film holder FH-835S
The FH-835S can be used with one or two strips of 35-mm film (size “135”). Each strip can be up to six frames long. It is also possible to insert single images or several small strips.
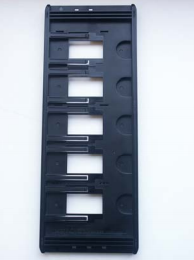
2.2.3 Medium format film holder FH-8695
The FH-8695 can be used to scan medium format film (size “120” or “220” roll film) and electron microscope film (59*82 mm). It is possible to insert single images or strips.
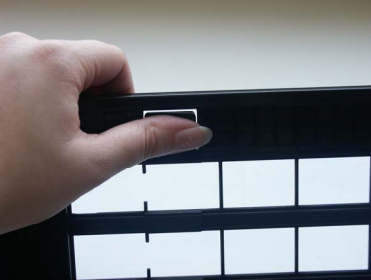
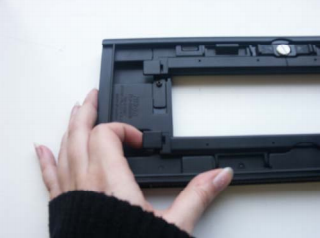
2.3 How to place the film in the holder
2.3.1 Small format slide holder FH-835M
2.3.2 Small format film holder FH-835S
2.3.3 Medium format or electron microscope film holder FH-8695
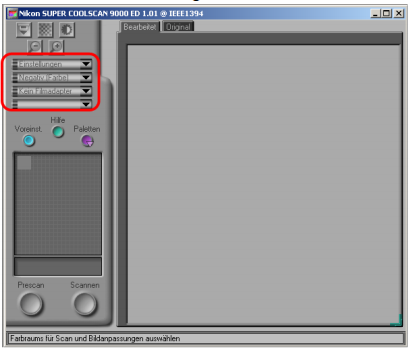
2.4 Starting of the software
Now you have different options. If you exclusively want to scan and save the images without editing them, start the programme Niko Scan 4. If you want to edit the images after scanning, it is useful to scan them by using the respective editing programme. In both cases Nikon Scan 4 opens (either directly in the editing programme or by clicking on it in the start menu). That is why you can follow the instructions, irrespective of whether you have started Nikon Scan 4 by clicking on it in the start menu or it has started itself in the editing programme.
2.5 Insert the holder
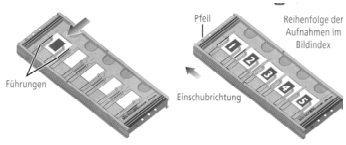
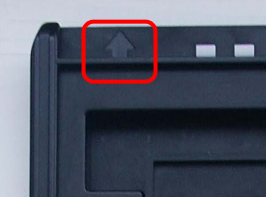
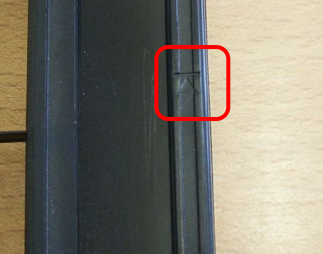
After you made sure that the status LED is glowing steadily, slide the holder slowly into the holder slot with the arrow up and keeping the holder straight.
If the inserted holder has reached the position of the arrows, the automatic loading mechanism will activate. Do not get confused by the different noises.
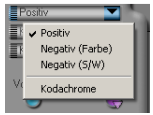
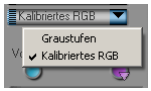
2.6 Choose film type and colour model
Now choose the film type which you put into the holder:
Now choose the colour model:
2.7 Pre-scan
- Open the image index:
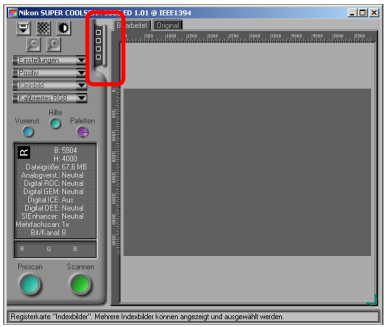
- Click on the icon to blend in the image index:
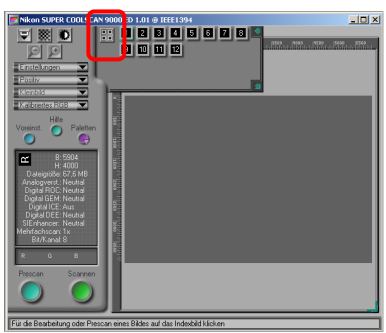
Now you can either click on single images or scan more than one image (batch scan) by pressing and holding the strg-button when choosing the images. By using the scroll bar at the right side of the image index you will get to the other images to select them.
Selected images are indicated by a blue frame. If the pre-scan is finished you will see the chosen images as followed:
2.8 Selecting a crop and adjusting other settings
By using the Tool Palette you can adjust different settings, that is to say it is possible to select certain crops of an image (under Layout Tools) or to adjust the output size and resolution. This Tool Palette also offers other functionalities. However, these settings are not mandatory (If you want to, you can go on to chapter 2.9 Scan and Save), but they can help you to improve the quality of your scanned images. It is recommendable to activate the Digital ICE4 Advanced (by ticking it in the appropriate menu item) if your originals are visibly scratched. This digitally corrects dust and scratches on the images. Unfortunately this procedure does not work with Kodachrome slides and b&w films.
2.9 Scanning and saving
If you select more than one image it is possible to save them at a desired storage location. During scanning a loading bar shows its progress and each picture opens in a new window.
2.10 Ejecting the holder
If the ejection does not start automatically after pressing the appropriate button or if you suddenly hear a rasping noise please switch the scanner off immediately and ask an advisor at the information desk for help! After you have finished scanning, please give the holder back to one of our advisors. If you want to scan beyond our consulting hours or if you cannot find any studIT advisor, please hand in the holder at the library counter.
slide scanner nikon superscan 9000 slides lrc kwz electron microscope